Basic Audio Editing
Audacity is a free tool that you can download on your computer to edit audio files.
To Begin:
- Download Sample Audio 1 for our guided lesson
- Add/use sound effects from our class soundboard:
Comm Tech 9/10
Comm Tech 11/12
Audacity
You download it and install it on your computer at home: audacityteam.org/download
- Works without internet
- Runs faster and handles bigger files better
- Supports plugins and more advanced tools
- Supports saving full project files (.AUP3)
Watch this video if you need a refresher:
Import / Record Audio
To import audio into Audacity: Go to File > Import > Audio and select your audio file.
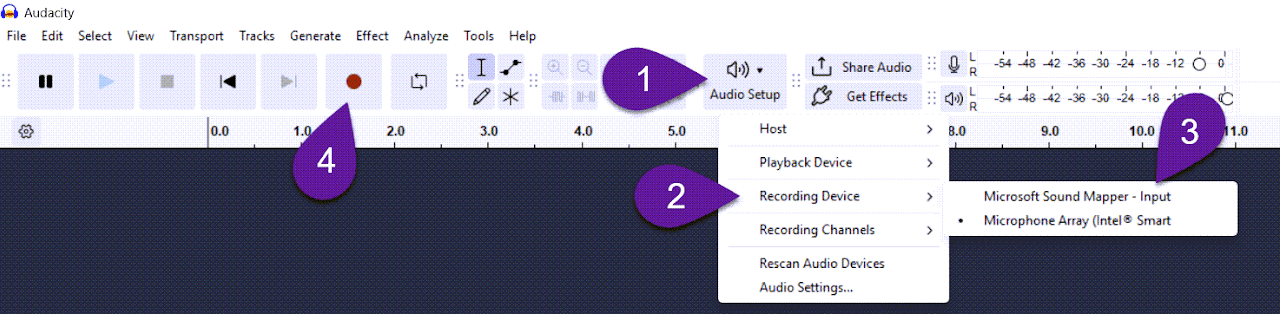
To record audio directly: Make sure your microphone is selected and press the red Record button.
Adjust Volume Level
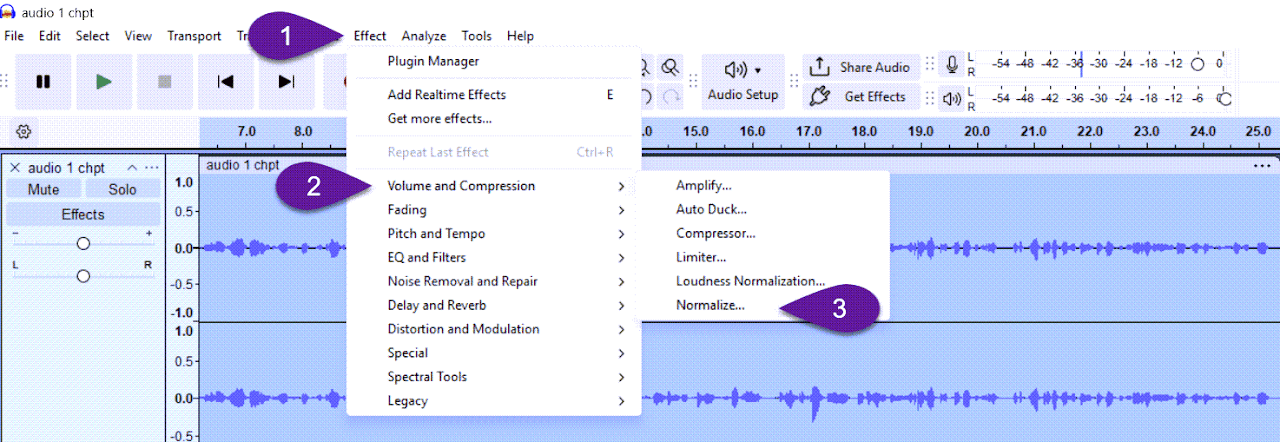
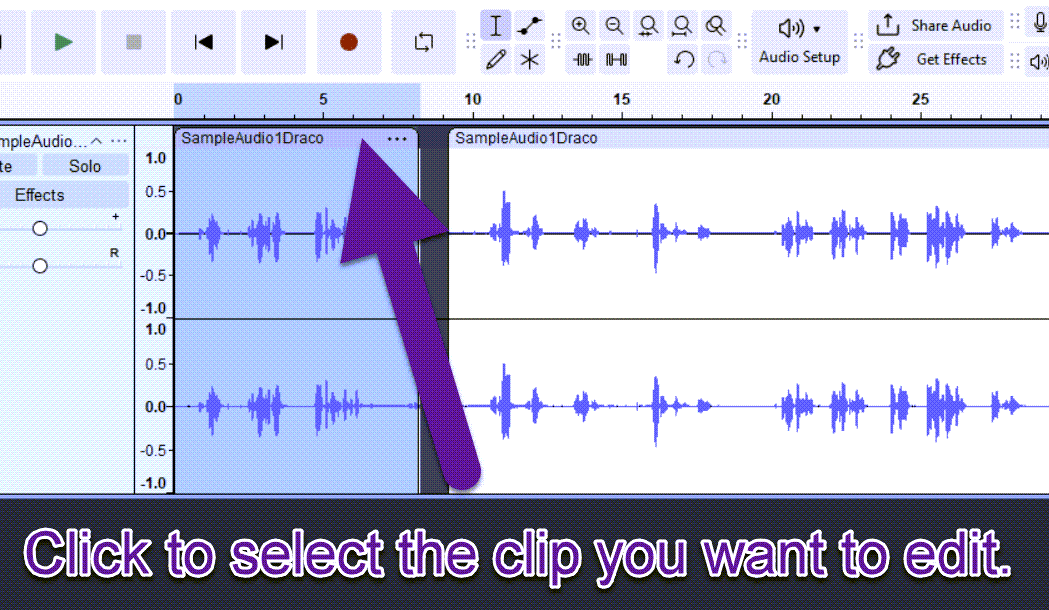
Select the Audio clip or track. Go to Effect > Volume and Compression > Normalize. Set the peak level to around -3 dB to -6 dB, then Apply.
This brings your audio to a clear, consistent level. If the volume is too low, it’s hard to understand. If it’s too high, it can sound harsh or distorted.
Side note: You can also use Effect > Amplify if you only want to adjust a specific section of your audio instead of the entire track.
Cut, Split, or Trim Audio
Click and drag to highlight the section you do not want, then press Delete on your keyboard. To split audio, place your cursor and go to Edit > Audio Clips > Split (or press Ctrl + I).
Master These
- Delete → Remove selected audio
- Ctrl + X → Cut
- Ctrl + I → Split
Select & Move Audio
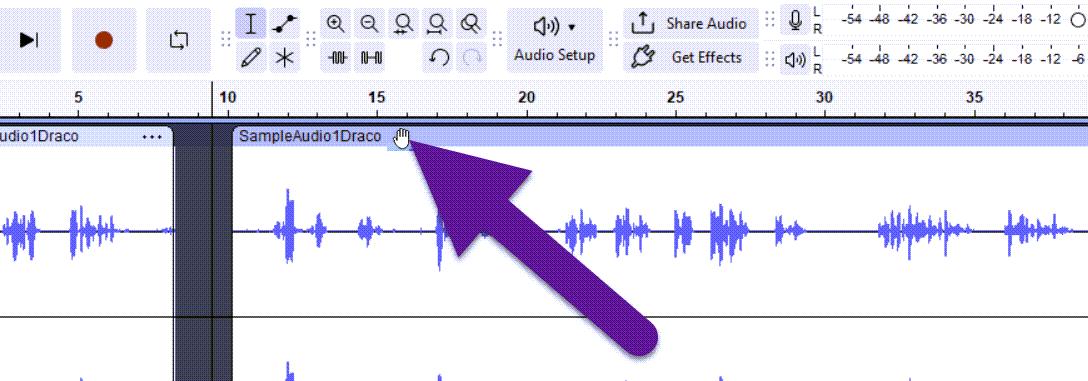
Click the top of the clip and drag the clip directly to reposition it without switching tools. This is useful for rearranging clips, lining up audio with video, or creating space between sections.
Add Effects
Go to Effect and choose something like Echo, Reverb, or Change Pitch.
| Fun Effects to Try | Semitones |
|---|---|
| Chipmunk Voice 🐿️ | +8 to +12 |
| Deep Evil/Villain Voice 😈 | -10 to -15 |
| Low/Deeper Voice | -3 to -6 |
| Hacker Voice 🥷 | -15 to -20 |
Save & Export
Save: Go to File > Save Project. This creates an .AUP3 project file to keep your edits for later.
Export: Go to File > Export Audio. Rename your file and choose a format. Exporting creates the version you can actually use, upload, or share!
Leave a Reply